Connectivity Issues – Wired – Mac/Other
Wired Diagnostics
-
For Mac
First things first – how to take a screenshot
Taking Screenshots Once you have completed the tests, we need to see the results. The best way to show them is to take screenshots. If you are unsure how to take screenshots, please familiarise yourself with the shortcut commands below. Screenshot shortcut: cmd + shift + 3 This will take a screenshot of the contents of the screen and save it to a file on the desktop. Please change the filename to the corresponding test. E.g. ping -c 100 gw.
In order to test connectivity and latency, we can instruct your computer to send and receive small amounts of data to one of Google’s servers, and to the equipment at your accommodation (these are called pings). For this we can use an application called Terminal, which is installed on your computer by default.
Performing a Ping Test:
- Open your Applications folder, then open the Utilities folder.
- Within the Applications folder, select and open Terminal. You will need to open two of these windows (Press cmd and n).
- Line up the windows side by side and enter the following commands, one in each window: First window: ping -c 100 google.co.uk
- Press Enter to start the command in each window.
- Allow all 100 pings to be completed. You will know when the test is finished as the text will stop scrolling and you will see the words “ping statistics“
- Take a screenshot of the results, without cropping the image so that we can see the time stamp
Second window: ping -c 100 gw

Your screenshot should look something like below:
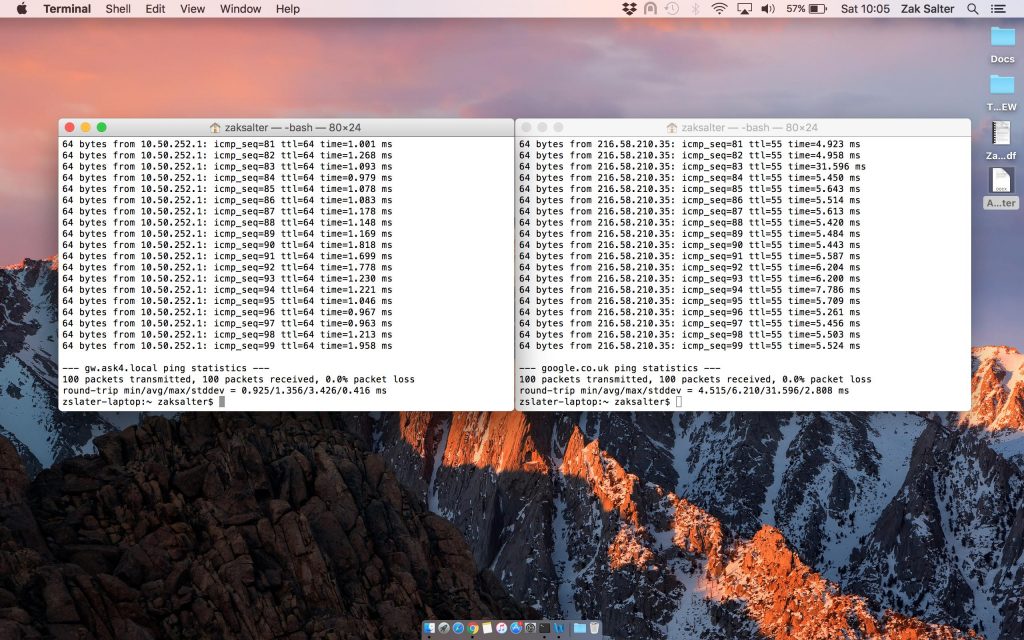
Please take a screenshot of this.
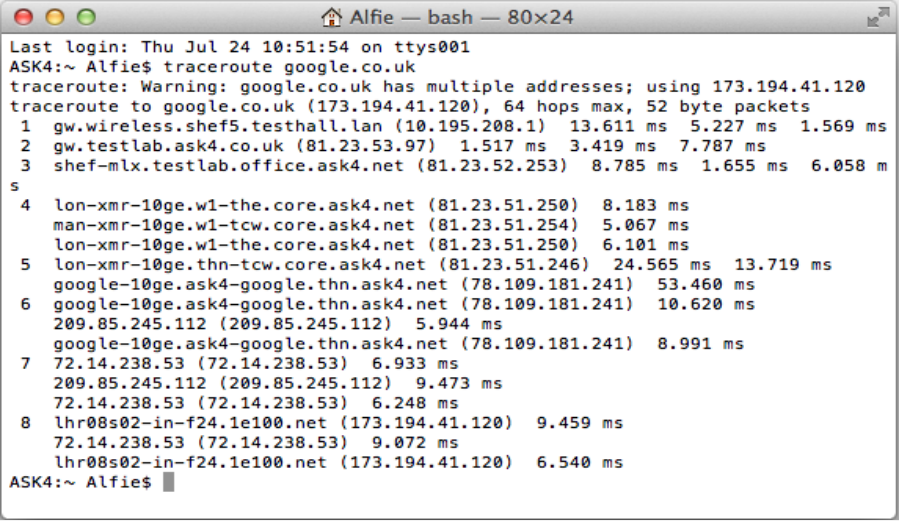
Next, In a new Terminal window, type the following command: “traceroute google.co.uk” (without the quotes) and take a screenshot when the test finishes (it should appear something like the below image):
Finally, we will next need you to do a prolonged download test to show us what speeds you can achieve in a typical real world file download.
To do this first head to the thinkbroadband website here.
www.thinkbroadband.com/download
You should then see the “Very Large File – 1 GB – (1,024 MB)” download test file.
All you need to do is right click on the red “1GB (v.large)” icon for the file and click “Save as…” and begin downloading it to your computer.
The final part of this test involves taking a screenshot of the rate at which this file is downloaded in your browser.
To obtain this information, navigate to the Downloads within your browser. This will display the download rate, with a unit of “MB/s” or “KB/s”. Please take a screenshot of this number (it should appear something like the below image):

-
Sending Your Screenshots
The screenshots should be saved to your desktop as .PNG or .JPG files.
These need emailing to the ASK4 Support team so that they can be analysed further.
To do so, please send an email to the following address: support@ask4.com Required information (please put this in the body of the email):
- Your full name
- Your building name, address and block/flat/room number
- Your contact number
- Your ASK4 username
- Your ASK4 issue reference number if you already have one (optional)
Please add the screenshots as attachments to the email. The Support team will reply with an issue reference number.
Please quote this in any future communications with ASK4 about this problem.