Connectivity Issues – WiFi – Macbook / MacOS
WiFi Diagnostics
-
For Mac OSX
First things first – How to take a screenshot
Taking Screenshots Once you have completed the tests, we need to see the results. The best way to show them is to take screenshots. If you are unsure how to take screenshots, please familiarise yourself with the shortcut commands below. Screenshot shortcut: cmd + shift + 3 This will take a screenshot of the contents of the screen and save it to a file on the desktop. Please change the filename to the corresponding test. E.g. ping -c 100 gw.
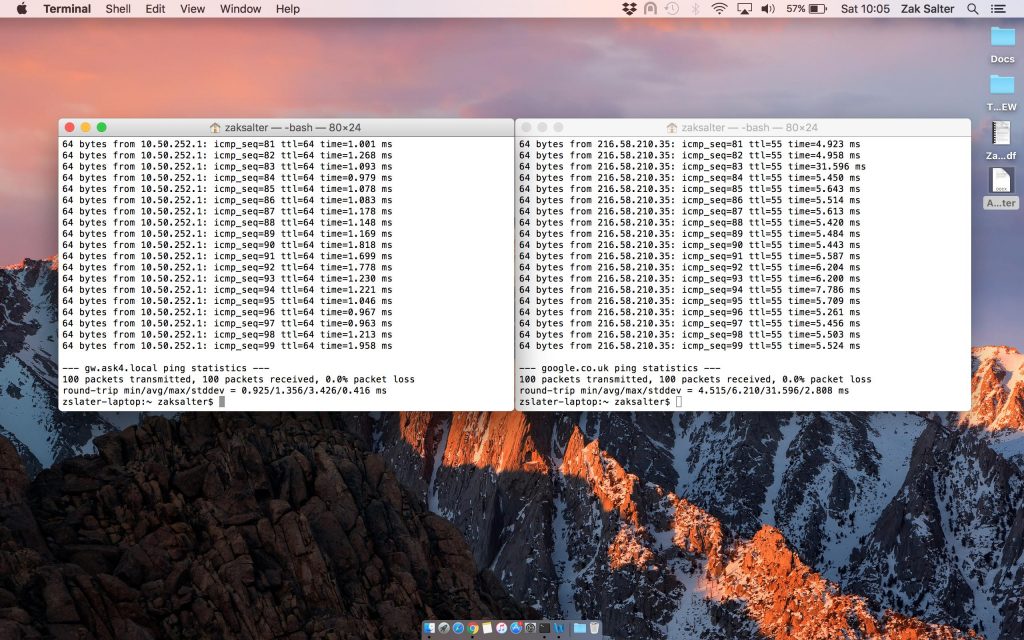
In order to test connectivity and latency, we can instruct your computer to send and receive small amounts of data to one of Google’s servers, and to the equipment at your accommodation (these are called pings). For this we can use an application called Terminal, which is installed on your computer by default.
Performing a Ping Test:
- Open your Applications folder, then open the Utilities folder.
- Within the Applications folder, select and open Terminal. You will need to open two of these windows (Press cmd and n).
- Line up the windows side by side and enter the following commands, one in each window: First window: ping -c 100 google.co.uk
- Press Enter to start the command in each window.
- Allow all 100 pings to be completed. You will know when the test is finished as the text will stop scrolling and you will see the words “ping statistics“
- Take a screenshot of the results, without cropping the image so that we can see the time stamp
Second window: ping -c 100 gw

Your screenshot should look something like below:
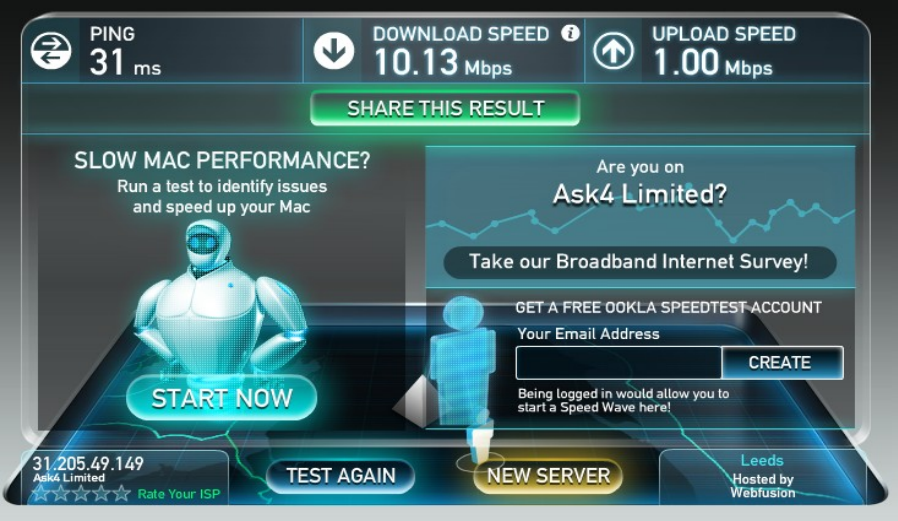
Next, we need to see a Speedtest
Please visit www.speedtest.net and click on ‘Begin Test.’ The test will begin and will perform three tests, one for Ping, Download Speed and one for Upload Speed.
Once the tests have completed, you will be presented with your results, please take a screenshot of this and name it Speedtest. An example:
For the next screenshots, you will need to download a free application called Netspot. To see the wireless environment as your device does, we can use a free application called Netspot. This app helps us to check for interference from other wireless networks or for problems with the equipment.
Performing the Netspot Test:
- Download and install the free version of Netspot here: www.netspotapp.com
- Open the Netspot application and ensure you allow location permissions in the window that pops up. You may also be prompted to upgrade to the paid version of Netspot. However, you can skip past this by pressing “Continue” at the bottom of the window to use the free version.
- Drag the window to display all or most of the networks
- Expand the BSSID column to show all of the characters and sort the Level (SNR) to show best to worst. See the example below.
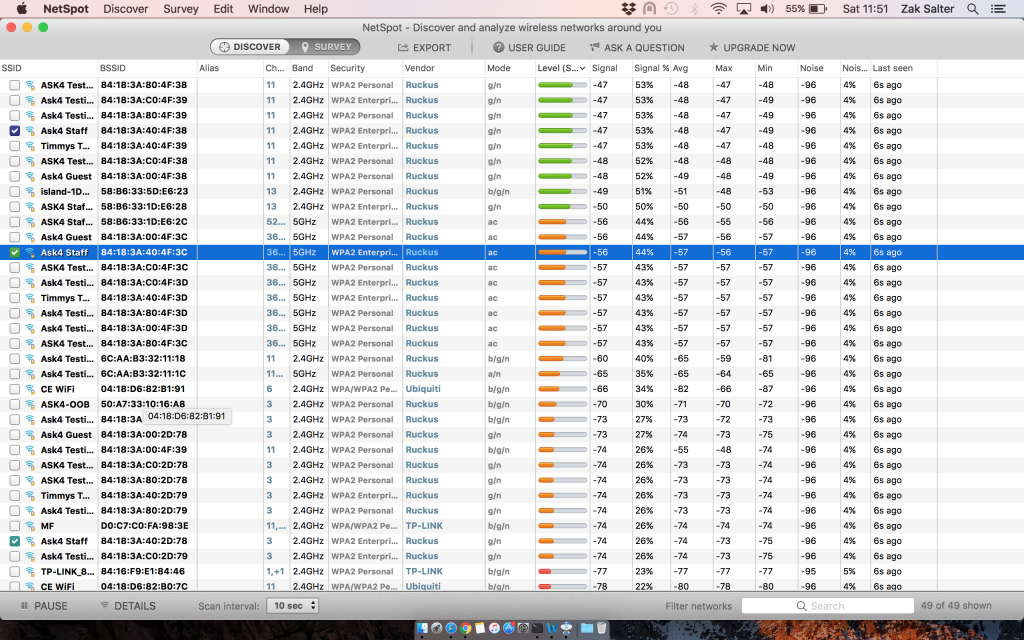
- Take a screenshot of your whole screen, so that the time is visible in the top right-hand corner.
- This screenshot should be taken in the specific position you are experiencing the problem, for example at your desk.
-
Sending Your Screenshots
Take a screenshot of your whole screen, so that the time is visible in the bottom right corner.
We require this screenshot to be taken from the location in which you experience the problem.
The screenshots should be saved to your desktop as .PNG or .JPG files. These need emailing to the ASK4 Support team so that they can be analysed further. To do so, please send an email to the following address: support@ask4.com
Required information (please put this in the body of the email):
- Your full name
- Your building name, address and block/flat/room number
- Your contact number (optional)
- Your ASK4 username (optional)
- Your ASK4 issue reference number